Tip of the Week – How to add text to long text without the Function Module
We've covered long text a few times this year.
Let's look at a practical use case a customer wanted to accomplish. This was for a tcode that did not have the Automate Function Module capabilities to upload and download long text as a contiguous string.
The use case was to add a blank line then append more text to the bottom. Cursor position is key here.
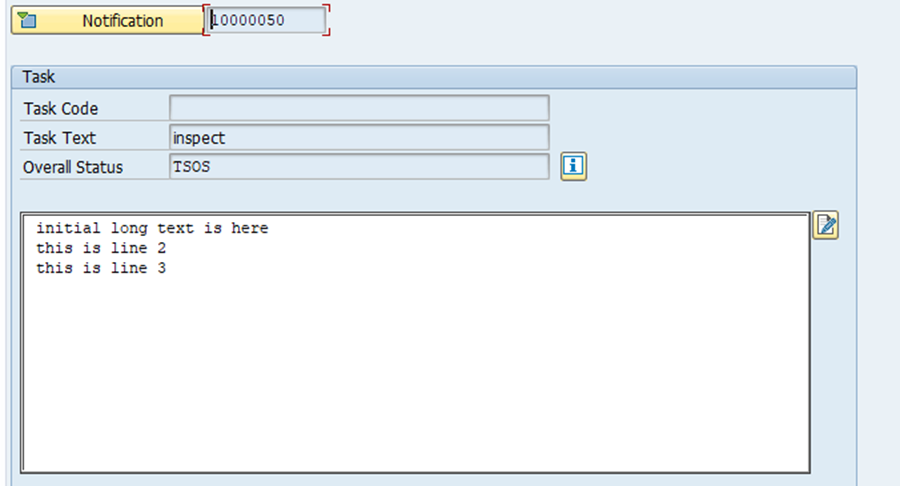
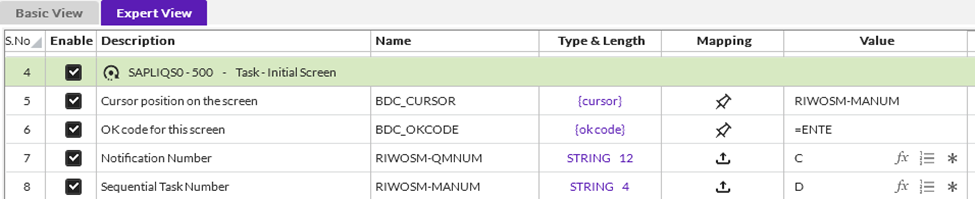
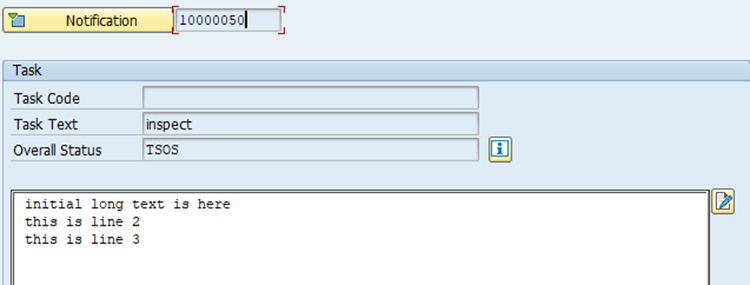
Here's the example in IQS12 – we pass in a notification number and task number and see the long text. For your tcode, you may have to navigate differently.
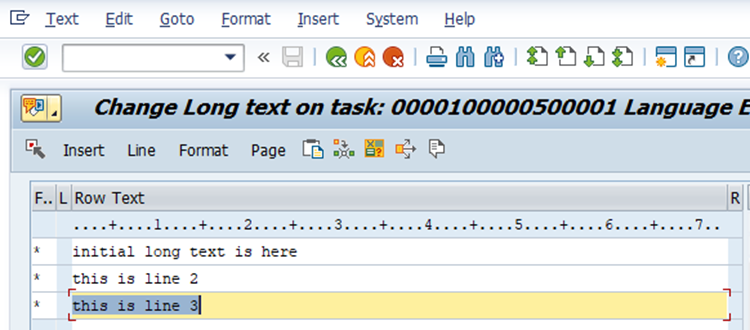
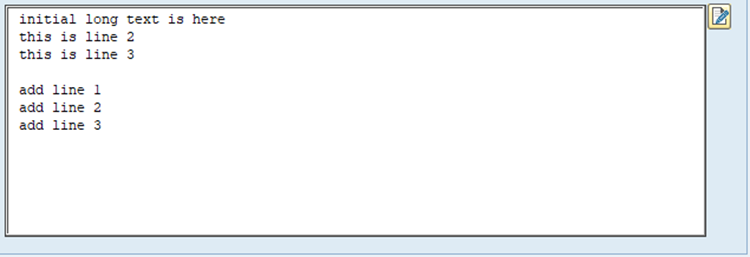
Here is the initial text that was pre-existing
We want to add a blank line (optional) and then add more text to the bottom.

Prepare to record
1. Enter the tcode and open the object you want to append text to – this varies by tcode
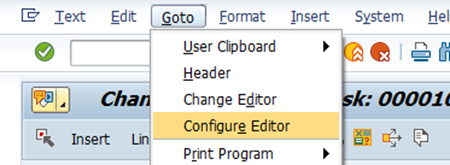
2. Go to the long text editor for the text you want to update – this can vary by tcode

3. Ensure you are using the line editor.
If you have the graphical editor, it looks like Word - Close it
then click Goto – Configure Editor
Uncheck the graphical editor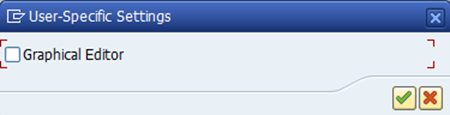
You can also check with your Basis team on setting the default editor to be the line editor
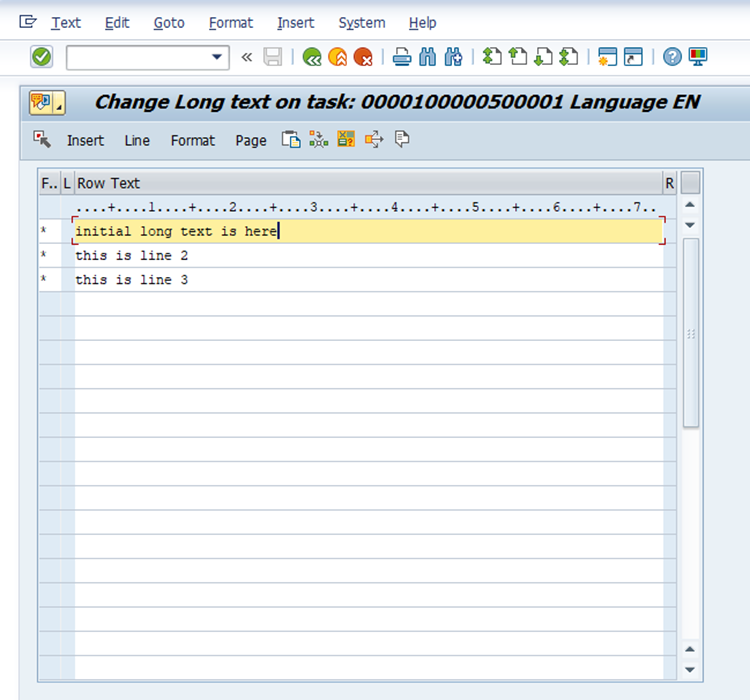
In the line editor, you can add lines up to 72 characters at a time.
4. Use the buttons on the top to navigate to the bottom of existing text so that you can add to the bottom. Cursor position is important.

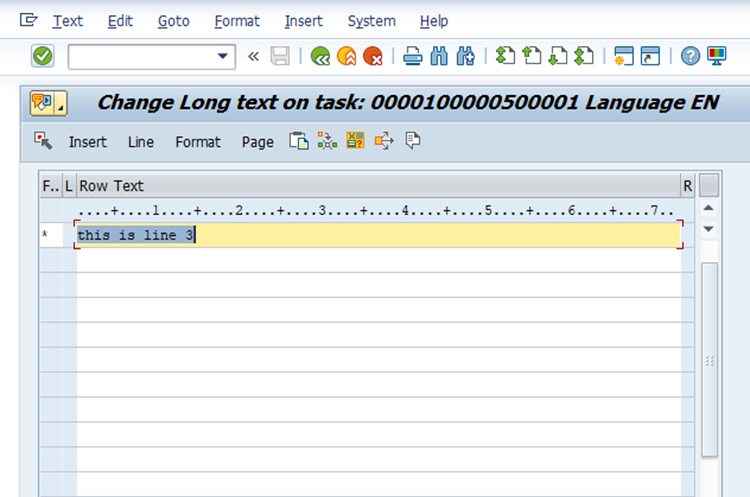
a. Position your cursor on the top row
b. Then click the page to bottom - notice the cursor position is on the last row
c. Now hit page down and you will see something like this. 
The top row is row (02) in the editor and has text, but everything beneath is empty – row (03) and beyond in the editor. This is how we can confidently add to the end without overwriting the current text.
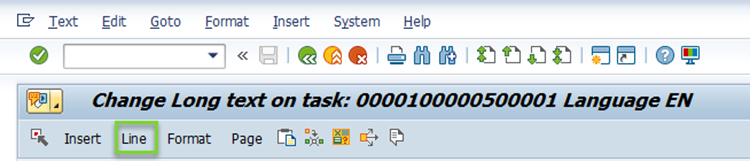
d. Now insert a line by clicking the Line button on top
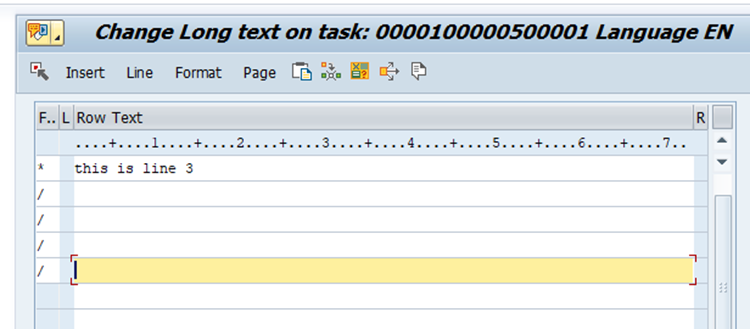
e. You will see something like this – notice the forward slash, which is like a new line or carriage return symbol and the empty row with the cursor positioned. This is actually row 03 in the editor – more on that in each approach below.

For adding rows, you can play around with Insert. I prefer Line, but that's personal preference
f. Back out of the editor – use the navigation button to return to the object in this tcode – it can vary by tcode <v:shape

There can be multiple approaches to adding long text to existing text
1. Add a fixed number of rows
2. Loop for a variable number of rows
Let's take a look at the steps and Expert View for each approach:
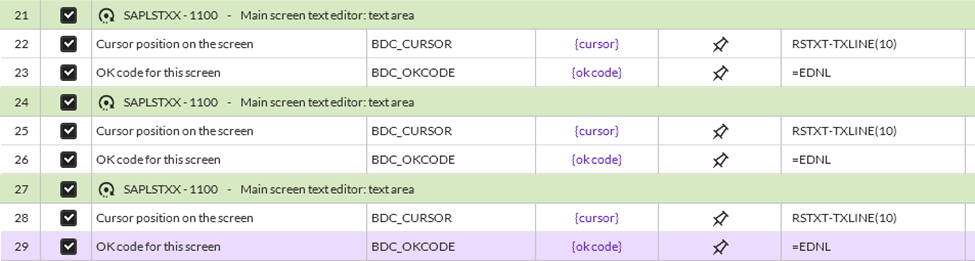
1. Add a fixed number of rows
Set a maximum number of lines possible to add – below I added 4 lines – 1 blank (optional) and 3 for text
The script will look something like this on the Expert tab
a) Open the object – this varies based on the tcode
b) Open text editor – navigation to this can vary based on the tcode and the long text you want to edit

c) Page to bottom of the long text – notice cursor position is row (02) – this is important

d) Page down of the long text – notice cursor position is row (02) again – this is important – if you move the cursor you may not end up where you think you will where the first row has text but the rest are blank

e) Click Line to insert a row – optionally add blank row between existing text and new text – note I arbitrarily chose row (10) to add rows – well below the prior text, you can use any row below the existing text

f) Click Line again for the maximum number of rows – I clicked Line 3 more times from row 10 – note you can record one row and then copy and paste in the mapper
g) Upload long text – note I hit enter (OK code /00) after the last row. See the row numbers (04) (05) and (06) this is important.
a. The top row had text – that's row (02)
b. The optional blank line is row (03)
c. That means rows 04-06 are where you add the long text – if you don't add a blank row in between old text and new text, you would use row 03-05

h) Exit the line editor – this can vary by tcode
pe>

i) Save – this varies by tcode – both navigation and the OK code
I can run this over and over and it will (1) insert a blank row separator (2) add 3 lines of text, each time

Long text now looks like this
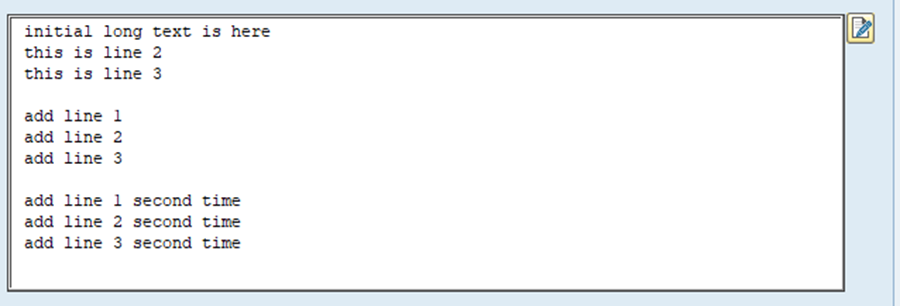
Run it a second time

Your long text now looks like this
We now have a repeatable process that doesn't overtype any of the existing rows.
You can make use of IF logic if not all rows are filled in for both the insert and the upload of long text. The details are beyond the scope of this post, but it is doable.
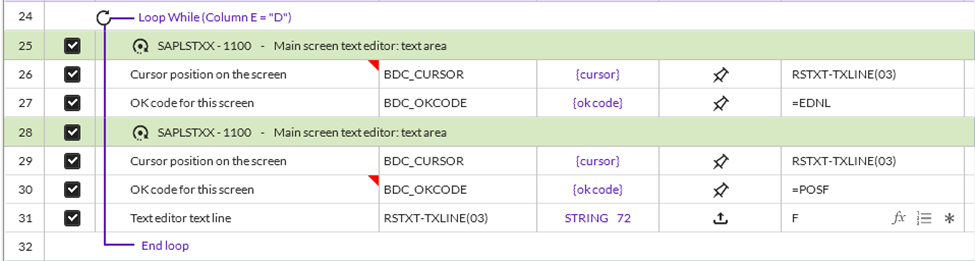
2. Use a loop - here are the steps, including what the script looks like in Expert View:
- a) Open object – this varies based on your tcode

- b) Open Line editor – navigation can vary based on your tcode

- c) Click Page to Bottom

- d) Click Page Down

- e) Click Line to add a blank line on row 10 (arbitrary but below current text) – optional

- f) Click Page Down to reposition on row 02 – optional but required if you want a blank row step e

- g) Add a Loop around these steps:
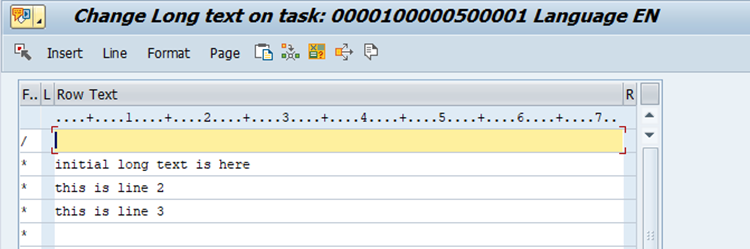
· Insert line row 03
· Upload text row 03 and Page down
- h) Back out of text editor – this may vary by tcode

- i) Save – this varies per tcode

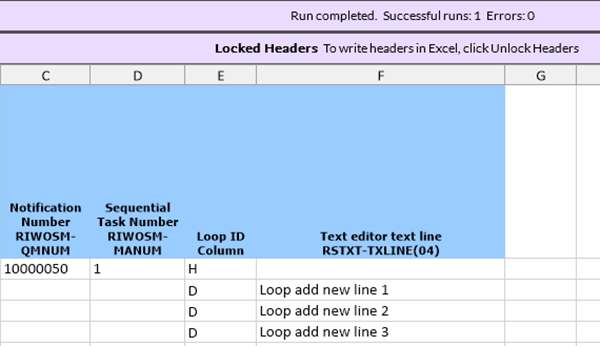
Let's run it
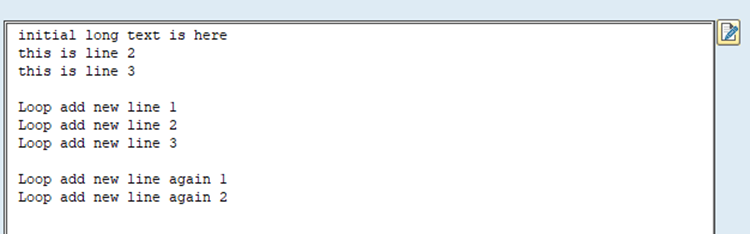
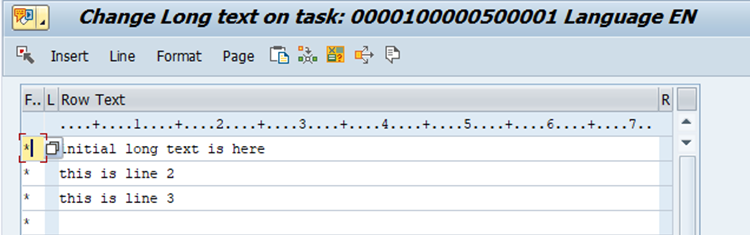
We start with this text
Script data
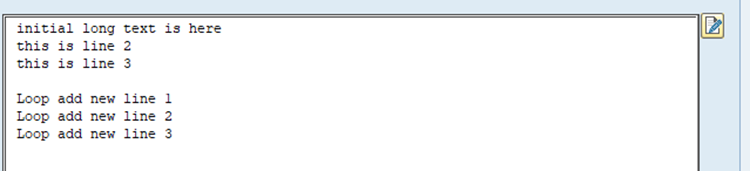
The long text looks like this now
Let's add more rows – this time 2 rows
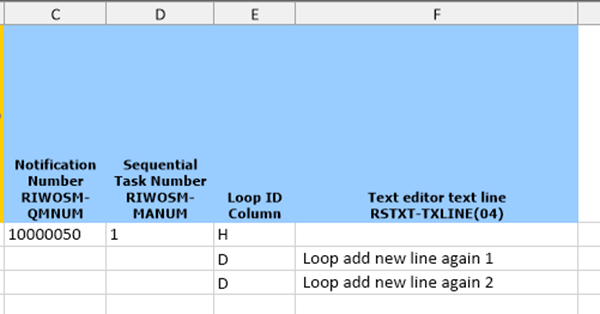
Now I see this
Adding text to the top
If you want to add to the top, position your cursor on the top row to the far left and click line
Click Line and see the row added above the other text. Repeat in for max rows or in a loop as above, but this time your cursor will be on the upper rows.
What can go wrong?
I strongly encourage you to run in DEBUG mode to see what is happening if:
· you are not positioned with row 1 of exist data showing and the rows underneath are empty
· you see blank rows in the wrong place – perhaps in between pre-existing text or even between the new rows
· you are seeing your text overwritten – whether existing or new rows
· text lines out of order
Remember the script is "blind", so in an editor you have to be sure you position to the right place – in this case a blank row that we added.
Happy scripting with long text!
Sigrid
------------------------------
Sigrid Kok
*Precisely Software Inc.
------------------------------